Getting started
Prequisites
System Requirements
You need a recent version of Python (we use Python 3.12) and a terminal emulator for your system. You will get the best experience with a terminal emulator that supports at least 256 colours and preferably one that supports 'true colour', i.e., 24 bit colour. If you can, enable blinking or flashing text in your terminal settings.
Installation
First, install the codelogician Python package.
After installation, codelogician --help will show you information about the various sub-commands,
but in this tutorial we are going to focus on the terminal user interface or TUI.
Starting the server
The CodeLogician TUI is designed to work as an interface to a separately running CodeLogician server,
which is included in the codelogican Python package. Our first step therefore is to start the server,
pointing it at a directory containing the software project we want to analyse and develop.
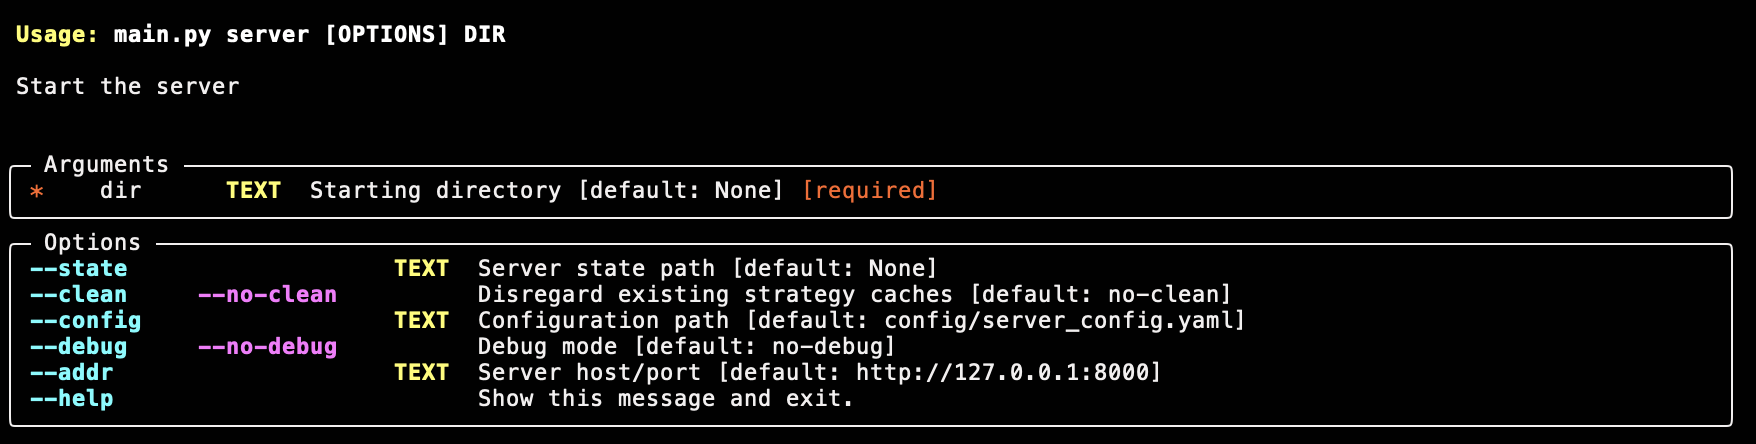
The server is started with the server sub-command of the codelogician command. We can get an
overview of this command using the --help options, like this:
codelogician server --helpwhich outputs the following:
We are going to use as our example software project a small Python package called
sample_math_lib, which for the purposes of this tutorial we will assume is in the directory
~/src/sample_math_lib. We need two terminal sessions: one for the server and one for the
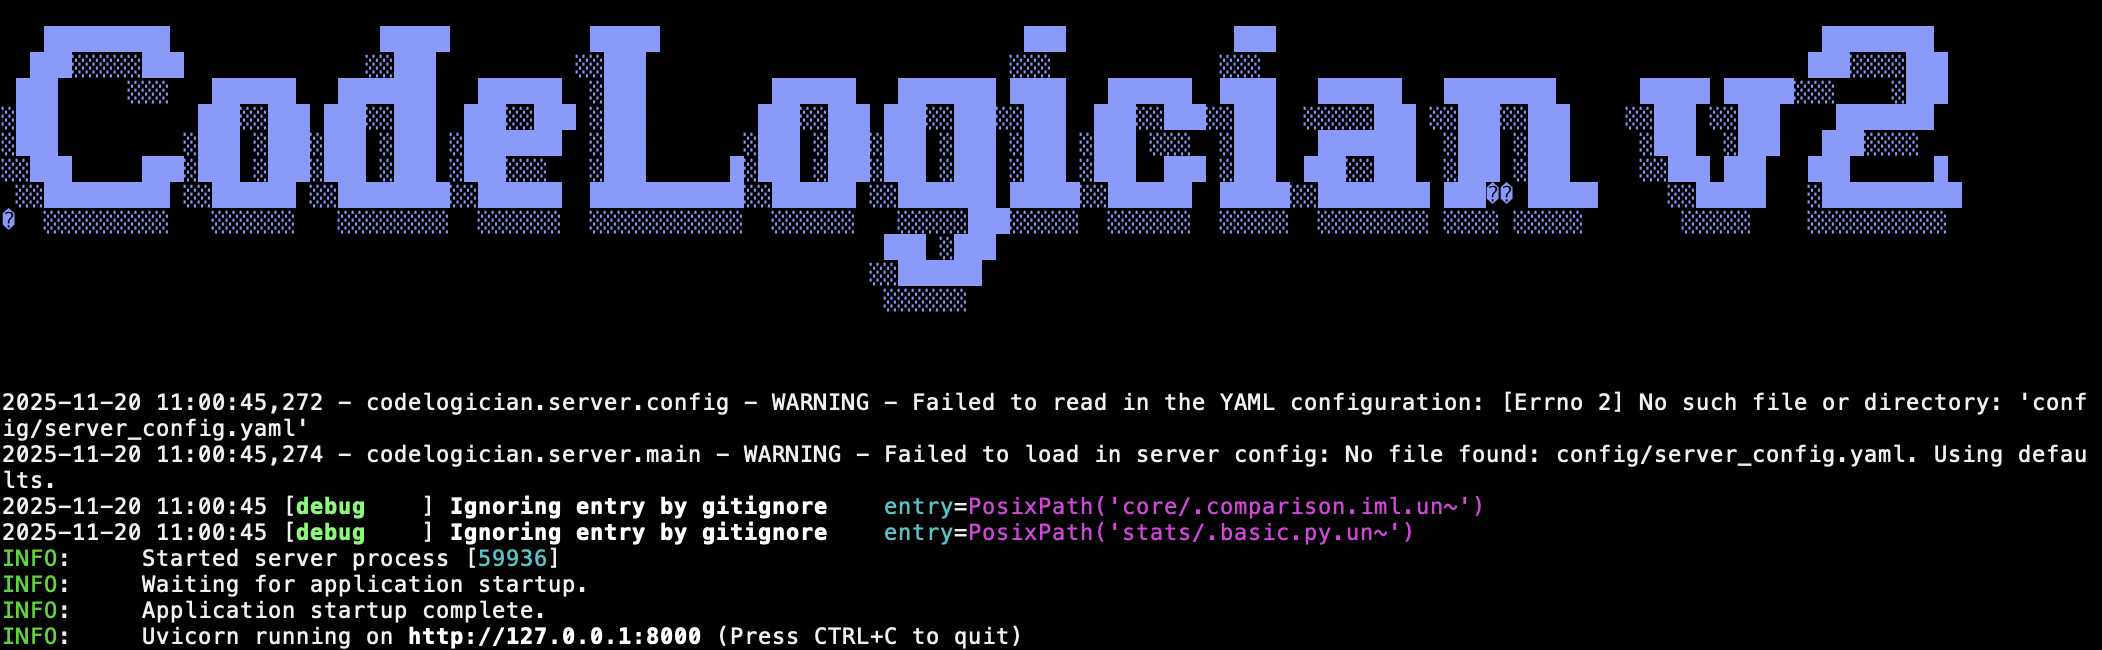
TUI. In, the first terminal session, we start the server with:
codelogician server --clean ~/src/sample_math_libThis should print a banner, a few log messages, and then wait for requests.
About the --clean option
The --clean option removes any previously saved analysis of this software
project (which would be stored in a hidden file called .cl_cache) and starts
from a fresh state. We'll use this for now so we can see CodeLogician in
action when we start the TUI, but in normal use, you would save time by
resuming from the previously saved state.
Starting the TUI
We'll start the TUI in another terminal session, using the tui sub-command, which has
these options:
codelogician tui --help
We could use the --addr option to point the TUI to any server, but in our case,
the default will do.
Terminal Size Tip
Make sure the terminal is a reasonable size (e.g. at least 120 characters wide by 40 lines high) before starting the TUI for the best experience.
To start the TUI, run
codelogician tuiThis should bring up a splash screen:
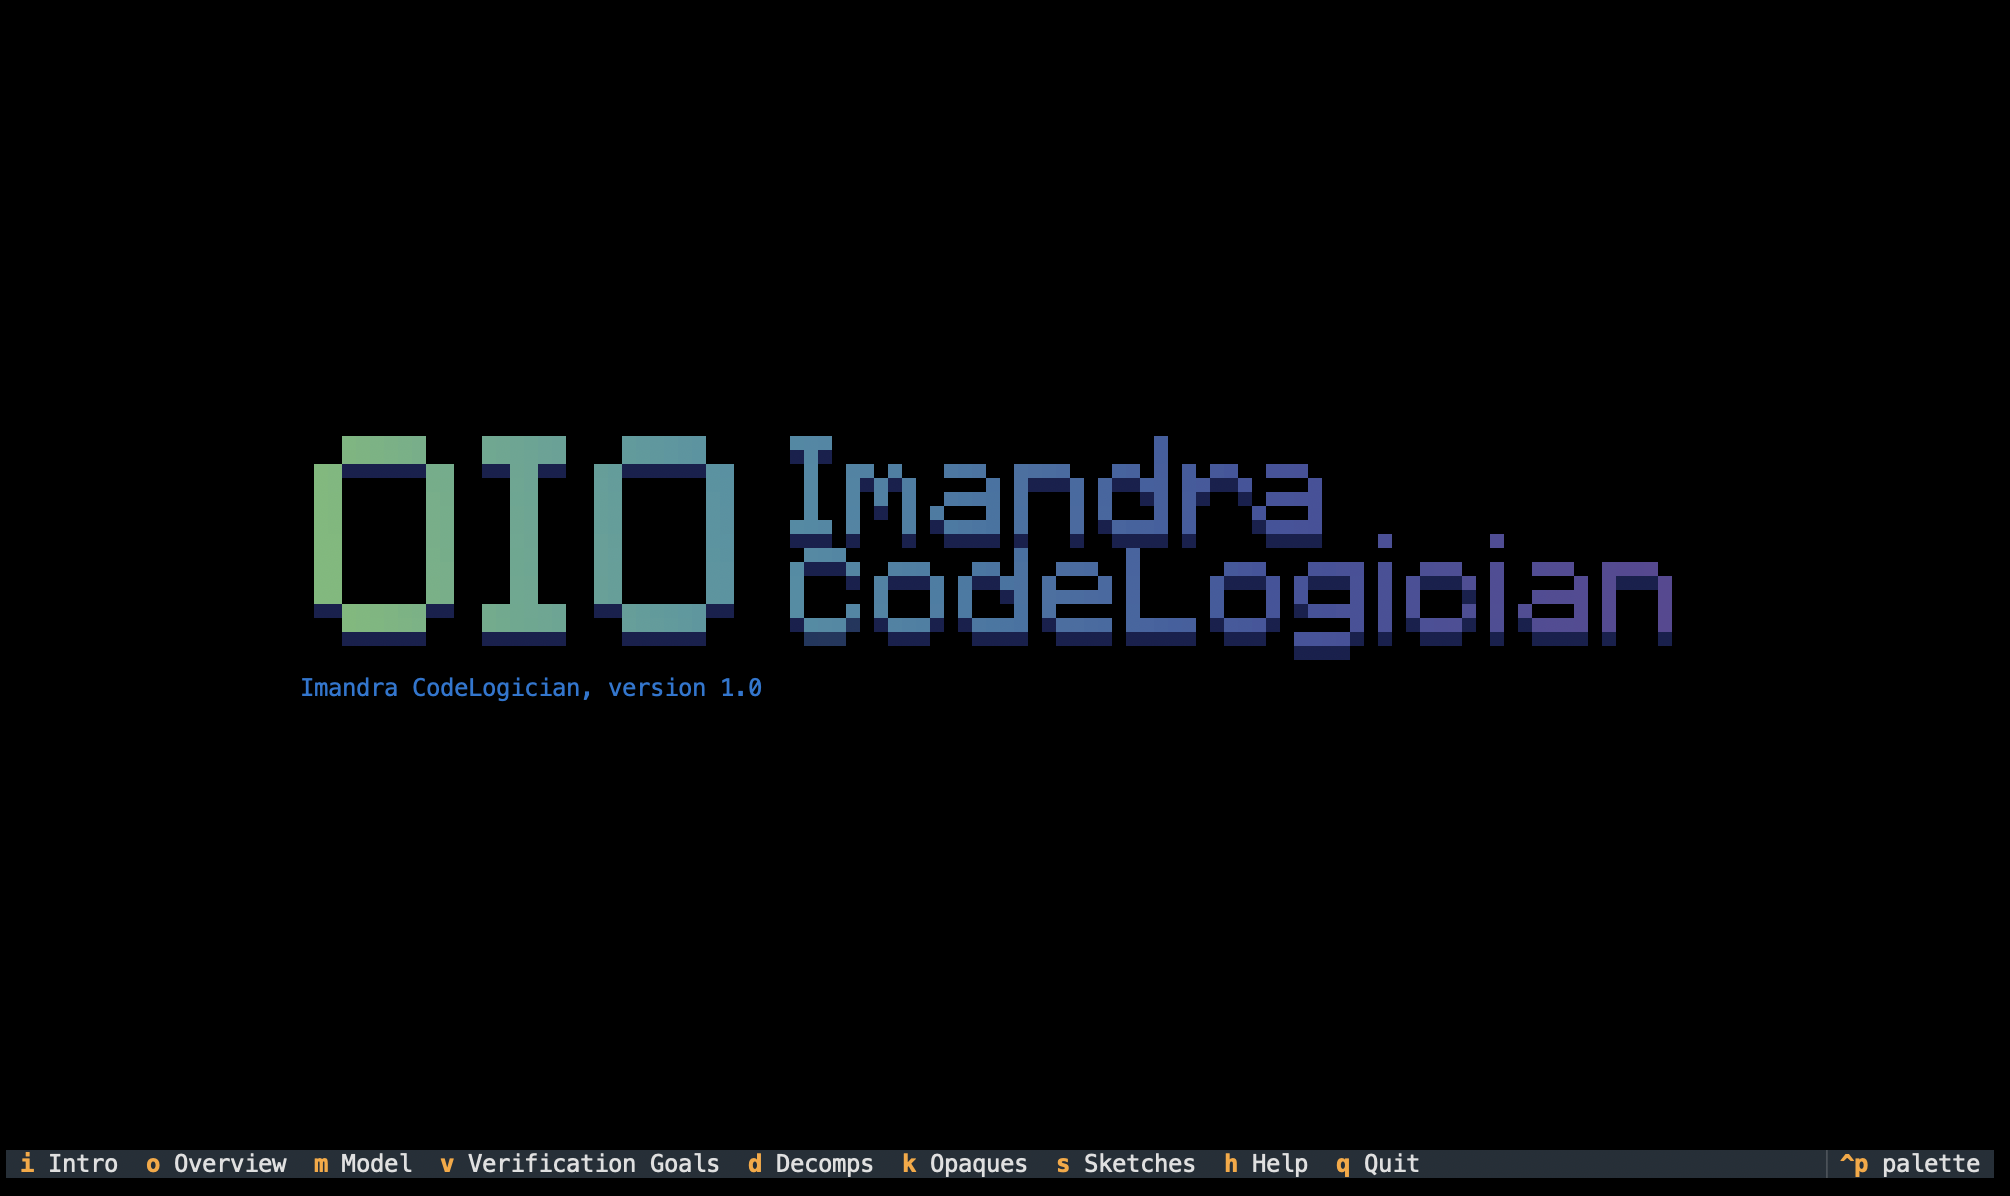
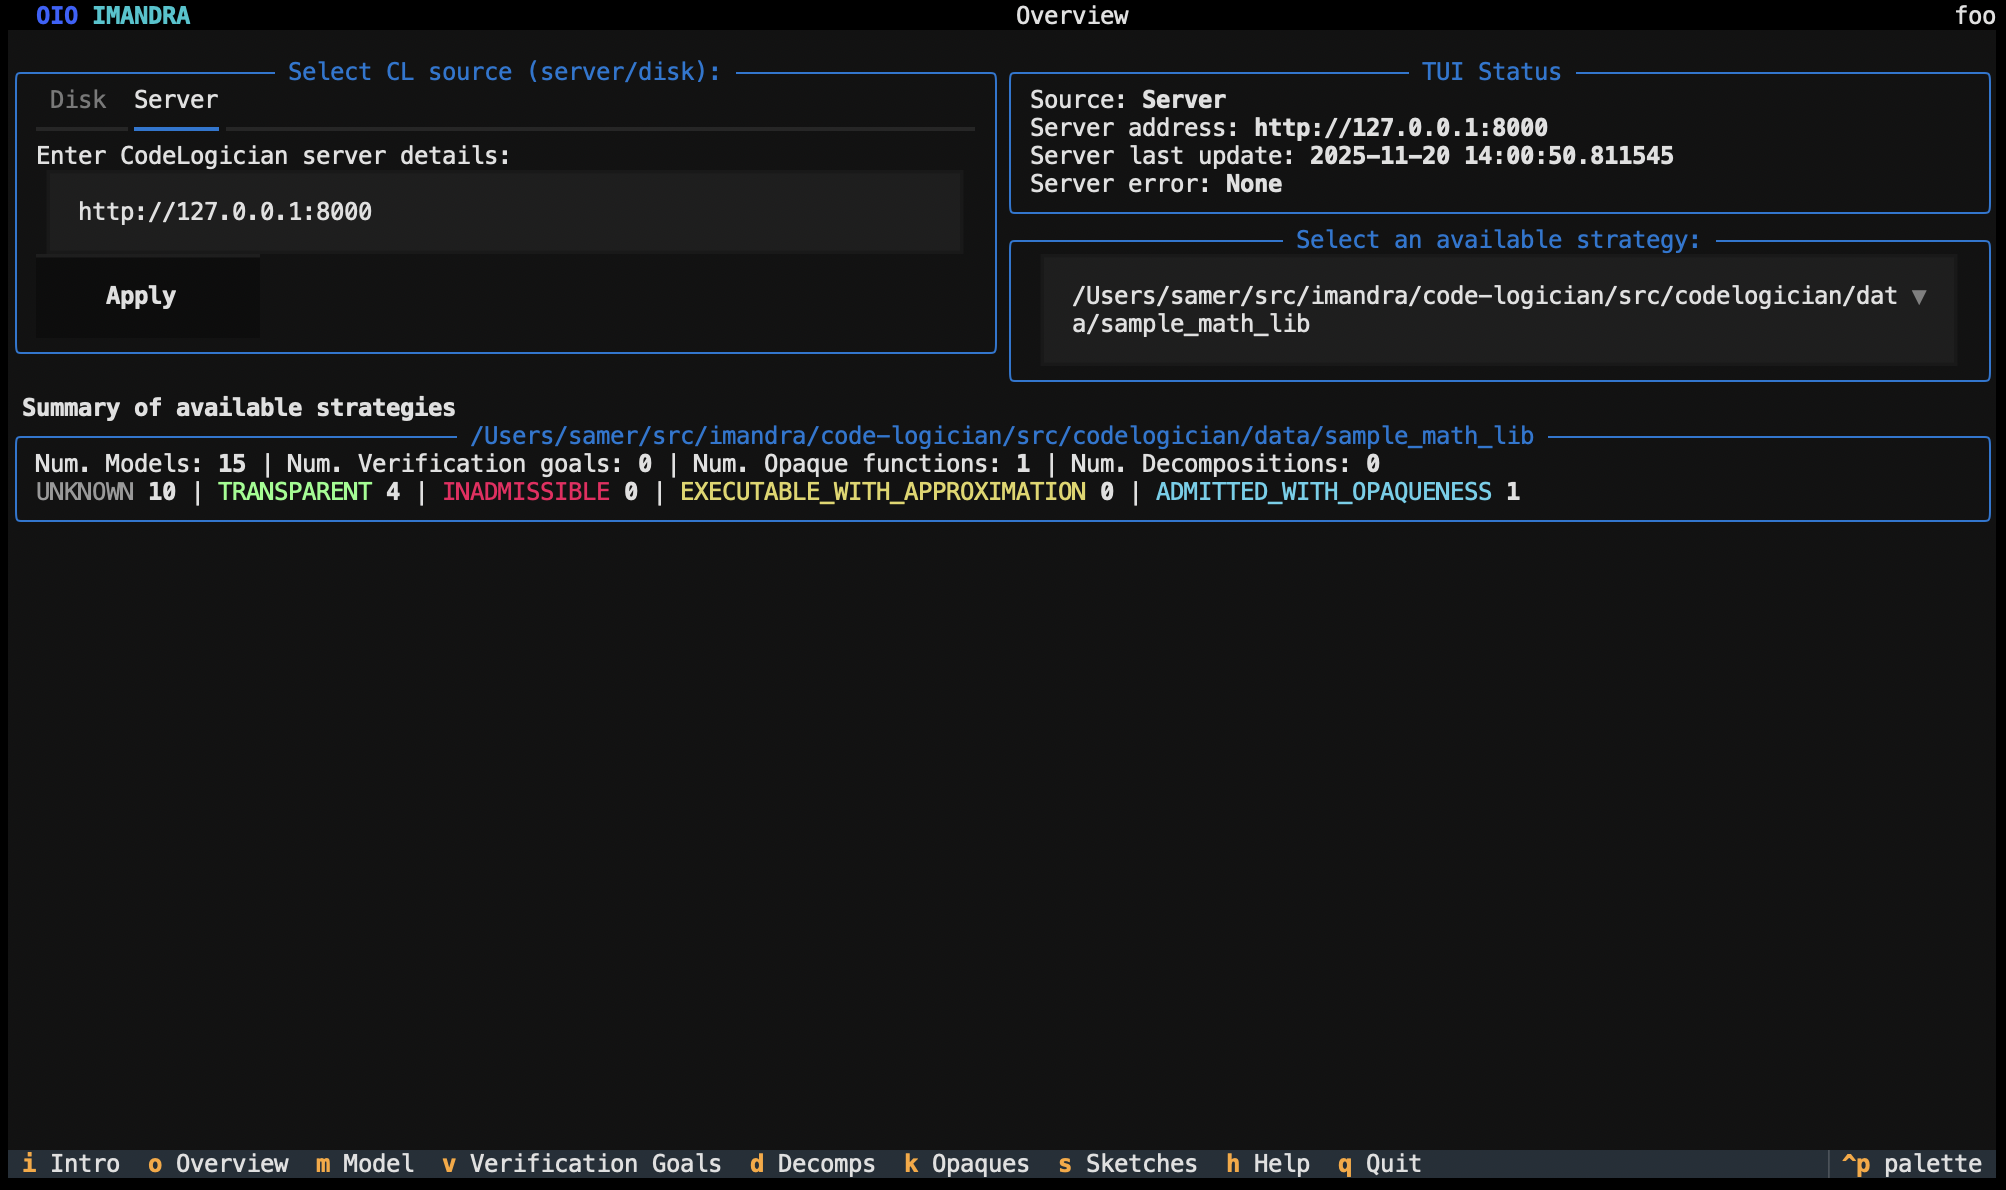
The TUI has several 'modes' or 'screens', which are listed along the bottom edge along with the keyboard shortcut for selecting that mode. You can also select these with a mouse click. For example, if you click on 'Overview' or press the 'o' key, the TUI will switch to the overview screen, which displays various summary information about the configuration and status of the TUI and the server.
Before we dive into more detail about working with CodeLogician in the TUI, we'll go over a some of the concepts and terminology around CodeLogician.
Quick Navigation Tips
Quit: Press q, click 'Quit', or press Ctrl-q to exit the TUI at any
time - Change Theme: Press Ctrl-p or click 'palette' on the bottom
right, then select 'Theme' - Switch Modes: Use keyboard shortcuts (o, m,
k) or click mode names on the bottom edge
Concepts and terminology
The core idea in CodeLogician (CL) is to formalise your code, which means rendering it into a form about which we can do automated reasoning, in order to assess its properties and verify that it will work as intended. The way we do this is to translate your software project into a formal programming langauge called Imandra Modelling Language (IML), which has a precise specification and semantics, and supports various kinds of reasoning, such as automatic theorem proving, using a reasoning engine called ImandraX.
Project structure
Most non-trivial software projects consist of multple files containing source code, sometimes organised in a nested directory structure. In CodeLogician, each source file is translated to a corresponding IML module, which is termed a 'model'.
In general, the original source files will have some sort of dependency structure. For example, in Python, each source file represents a module, and can import other modules from other source files. CL detects this dependency structure, and as long as there are no circular dependencies, it will be reflected in the dependency structure of the set of IML modules (models) that are the formalisation of the source files. This set of interdependent models is termed a 'metamodel'.
The CL server manages each metamodel using a 'strategy', which determines a few things about how the metamodel is created and maintained in relation to the set of source files. The server can manage multiple strategies, each of which looks after one metamodel derived from all the source code under a particular directory.
The TUI displays information about a single metamodel, which is selectable from the overview screen.
Formalisation
As we mentioned above, the formalisation of a source file is an IML module which has been processed by ImandraX in order to check certain properties of the code.
If you are familiar with any of the 'ML' family of statically typed functional programming languages, especially OCaml, you will recognise that IML code looks a lot like OCaml code. But even more so than OCaml, IML is a language of pure and total functions, which means there are no so called side-effects (functions denote their return value and nothing else), no mutable variables, and functions must handle any inputs of the appropriate types without raising exceptions.
(Footnote: the 'M' in 'ML' languages stands for meta, while the 'M' in IML stands for 'modelling'.)
Admissibility and termination checks
If the model passes certain basic checks, then it is termed 'admissible'. The most basic of these checks, beyond being syntactically well-formed, is that the code type checks. Given that IML, in common with the other languages in the ML family, is based on the Hindley-Milner type system, with algebraic data types and high order function types, being well-typed is already a moderately strong guarantee of good behaviour. However, ImandraX goes a step further in checking that all functions terminate for all possible input values.
Transparency and opaqueness
Understanding Opaque Functions
Some modules may be formalised with so-called 'opaque' functions. These are functions that have a declared type, but no implementation. These might be used for:
- Functions that do not have a direct equivalent in IML
- Computations we don't want ImandraX to reason about beyond their declared type
If a model contains opaque functions, the module is 'admitted with opaqueness'; otherwise it is termed 'transparent'.
Exporing the 'Model View'
Pressing 'm' or clicking on 'Model' on the bottom edge of the TUI brings up the model view.
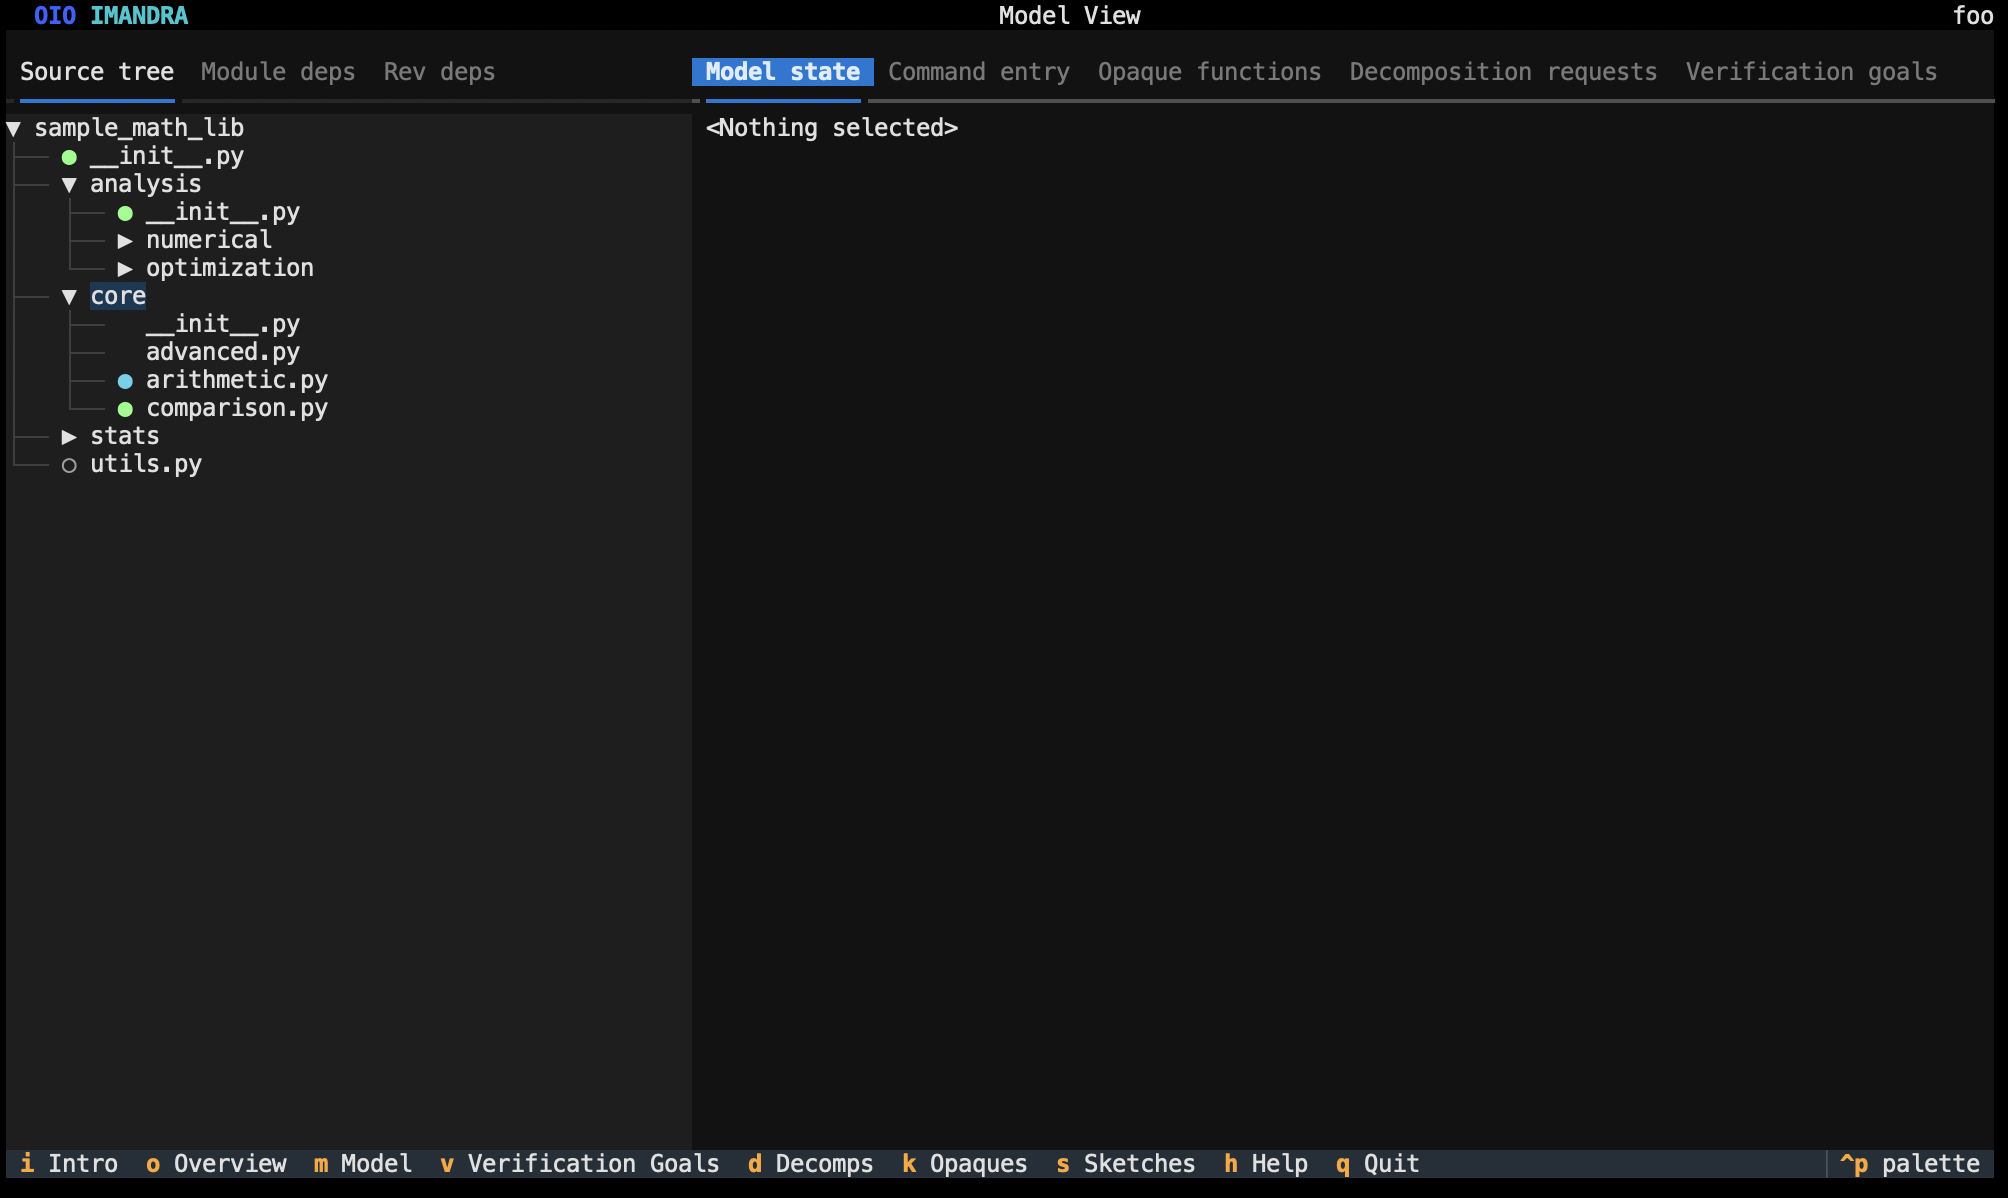
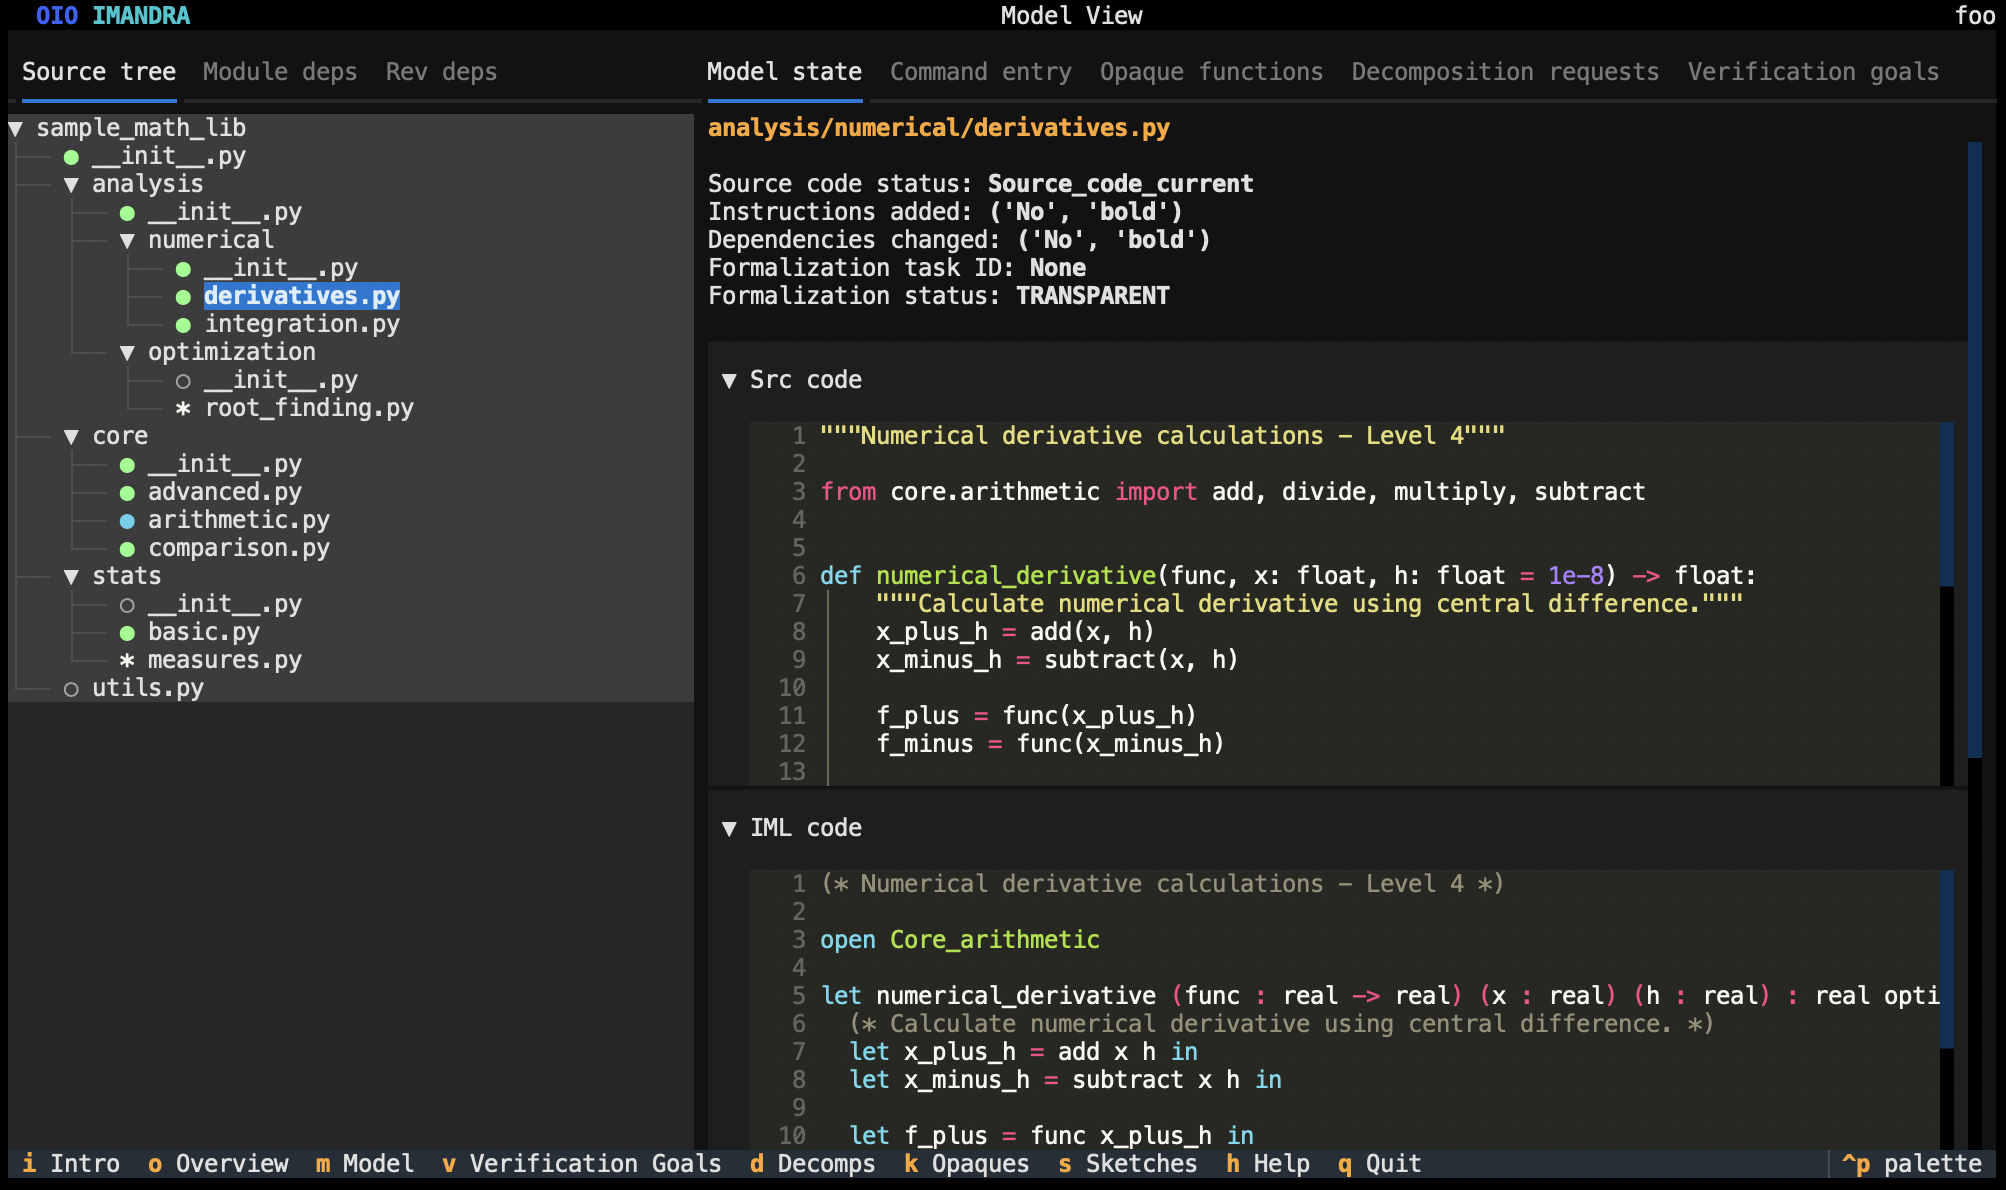
You can click on the tree view on the left to explore the directory tree. Each Python file will have a coloured indicator to the left showing its formalisation status.
Status Indicators
- 🟢 Green: Transparent (fully formalized with all functions implemented)
- 🔵 Cyan: Admitted with opaqueness (contains some opaque functions)
- 🔴 Red: Inadmissible (failed formalization checks)
- ⭕ Open circle: Not yet analyzed
- ✳️ Flashing asterisk: Currently being analyzed
If you click on a formalised Python file, you should see formalisation details in the right panel.
Both the tree view on the left and the panel on the right have several tab panes that you can select. We'll examine the tree view panes first.
Tree view panes
The initial view on the left shows the directory tree of the source project, starting at the directory that passed as an argument when we started the server.
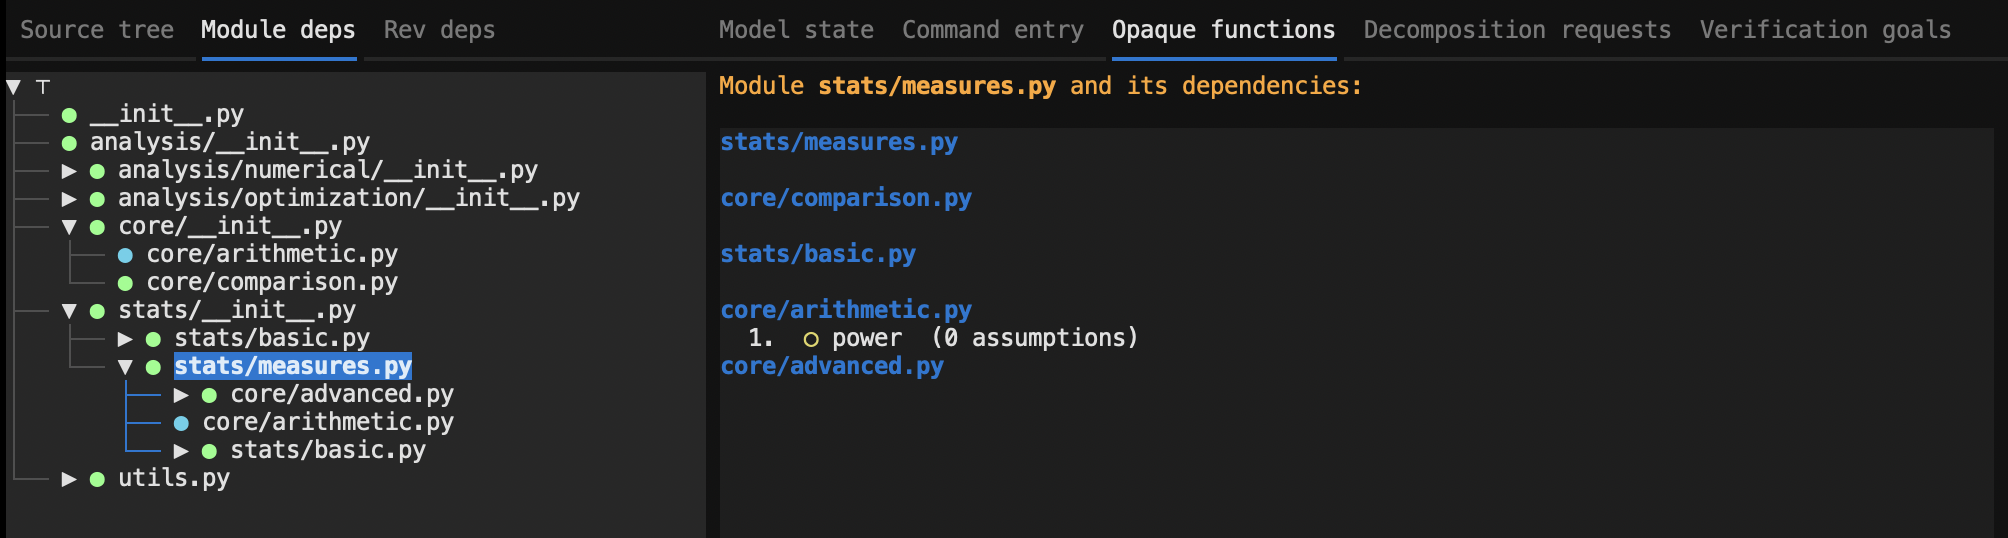
The pane next to it, labelled 'Module deps', shows the module dependency graph, but as a tree, where the children of each node in the tree are the modules that it depends on (i.e. 'imports' in Python) directly, that is, its direct dependencies. Since several different higher level modules can import the same low level module, the lower level modules can appear duplicated in multiple places in the tree. The example below shows a partially expanded module dependency tree.
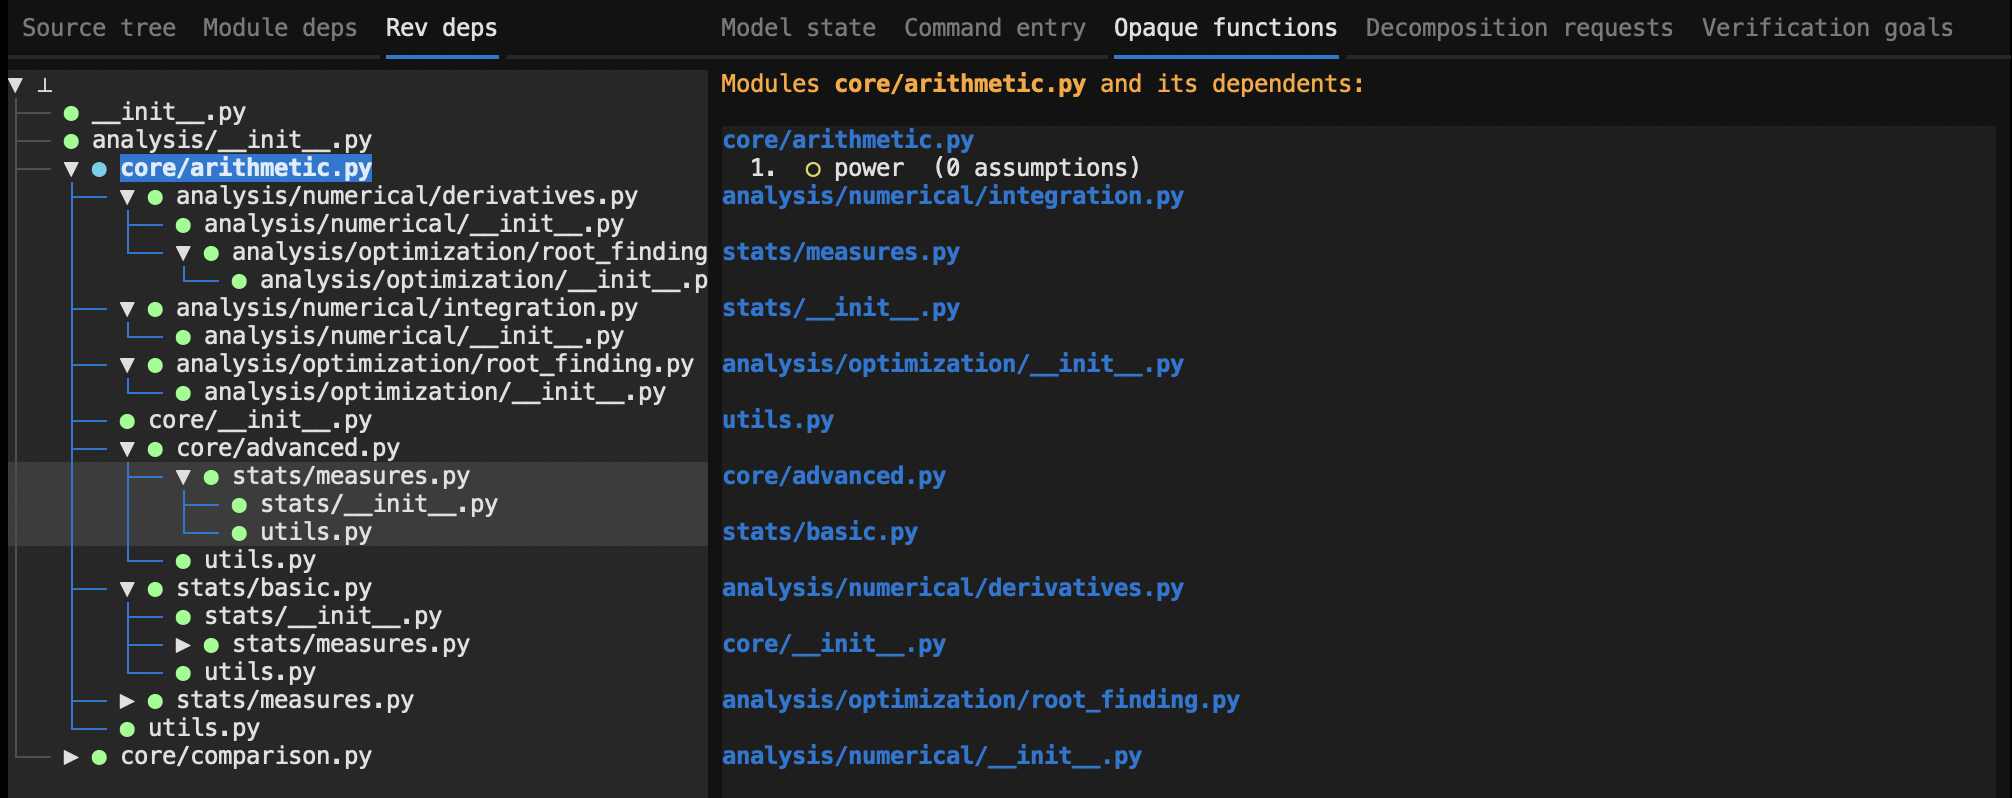
The third panel, labelled 'Rev deps', shows the reverse dependency graph, where the children below each node in the tree are the modules that depend on it directly, that is, its direct dependents. Again, a single module can appear at multiple places in the tree.
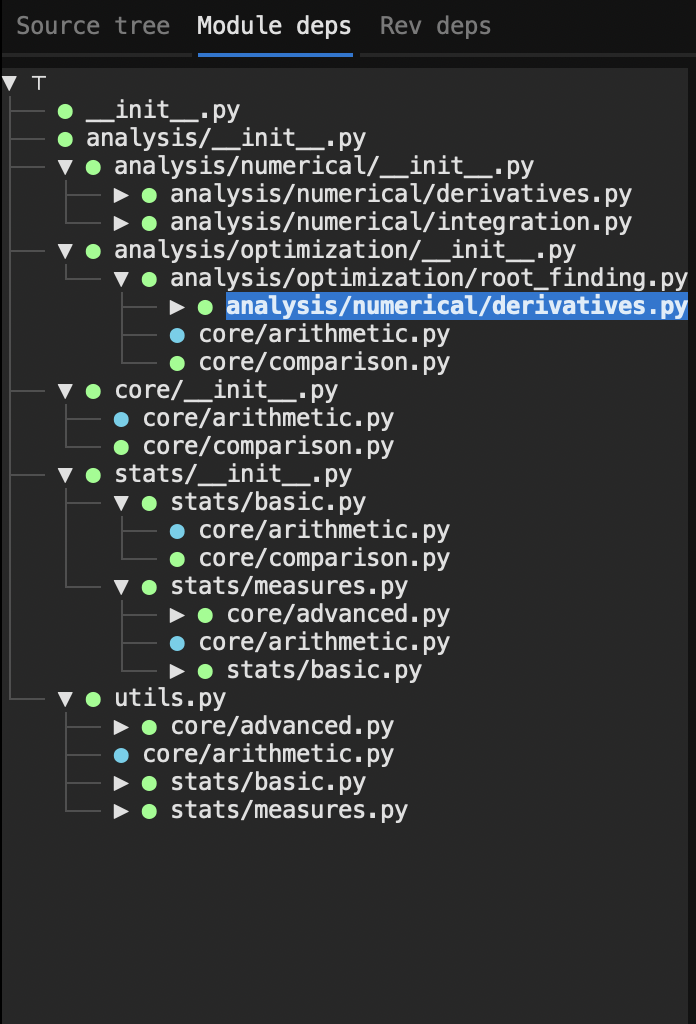

Notice the 'top' and 'bottom' symbols used as the root nodes in the dependency and reverse dependency trees respectively. Notice also that each module is labelled by its full path (relative to the project root) in th dependency views, while the path is implicit in the 'Source tree' view.
Right panel panes
On the right we have five panes: 1. Model View 2. Command entry 3. Opaque functions 5. Decomposition requests 4. Verification goals
In the current version of CodeLogician, verification goals and decompositions are not computed by default, so we'll defer a discussion of these to part two of this tutorial. Also, the 'Command entry' screen is not functional yet. Let's have a closer look at the 'Model view' and 'Opaque functions' screens.
Model view pane
After formalisation, the model for sample_math_lib/core/arithmetic.py module
looks like this:
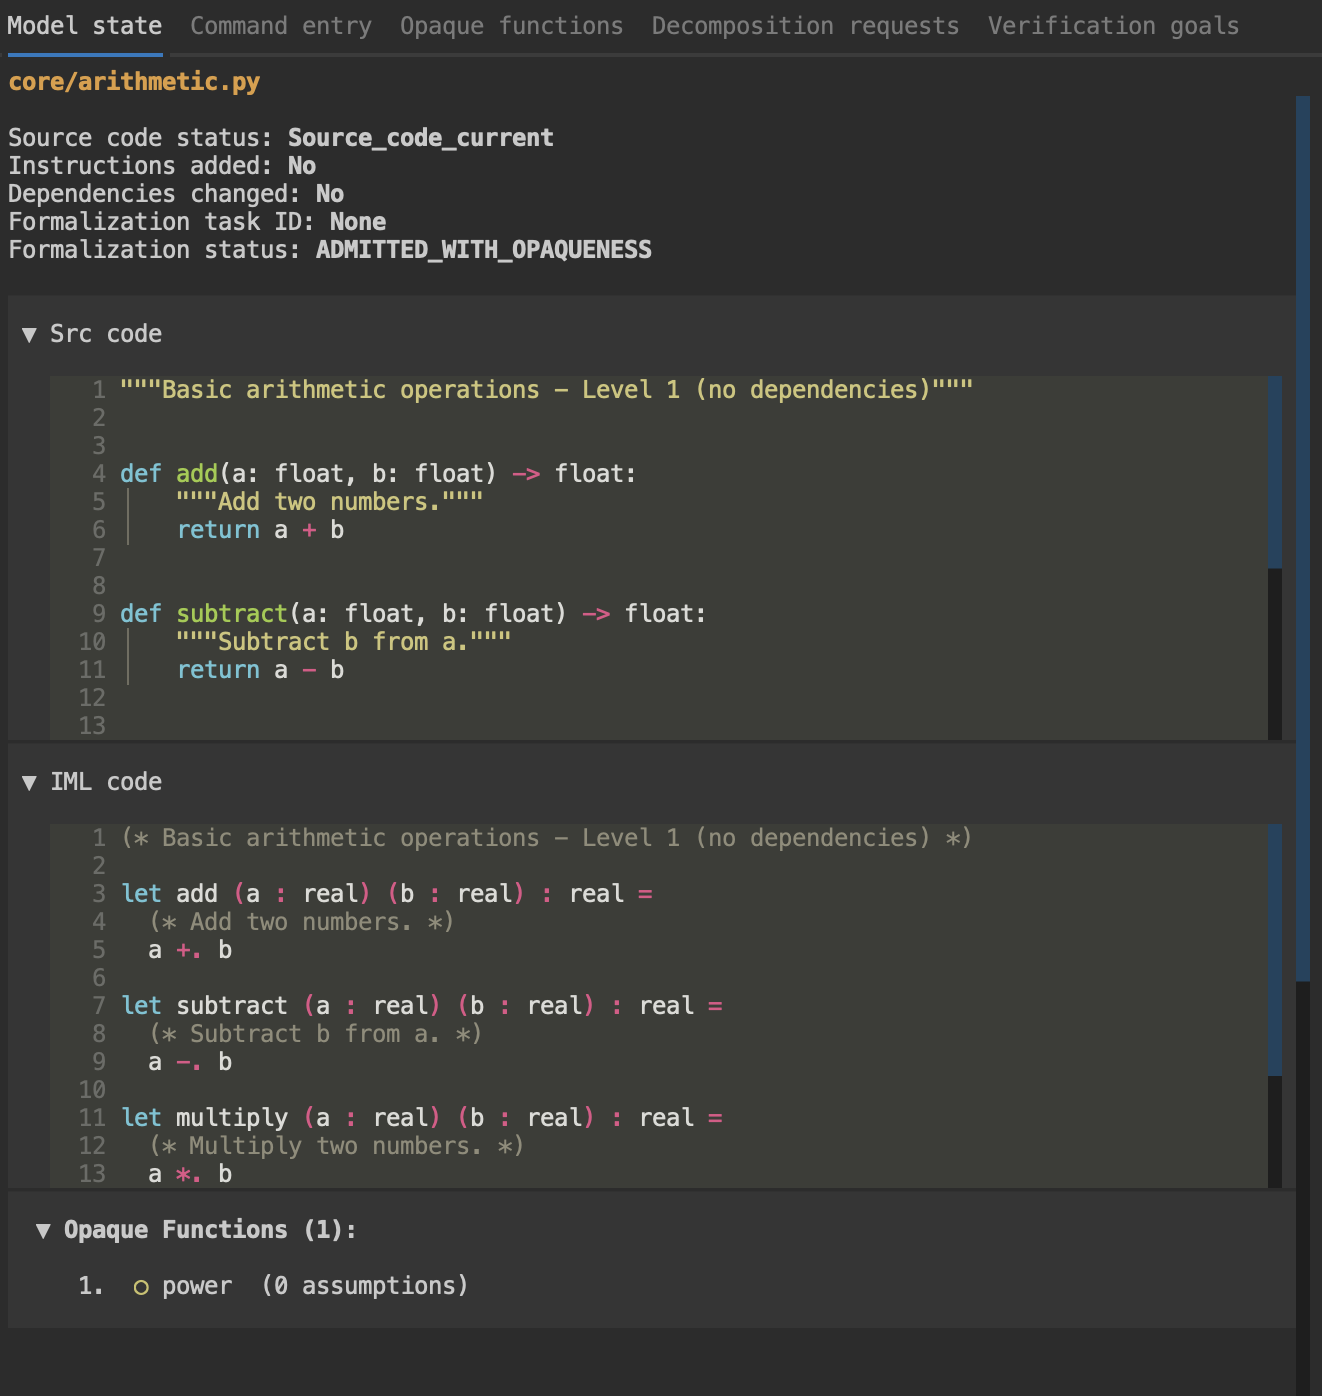
The top part shows some summary information about the model, including the
status of the model as 'admitted with opaqueness'. The 'Formalization task ID'
is None because the formalisation is complete--it will be filled when
the formalization is actually in progress.
The three collapsible panels below contain the original source code, the
automatically generated IML code, and, for this model, information about
opaque functions that were introduced. In this case, the power function
is left opaque because there is no real-valued power function built into to
IML.
The consequence of this is that ImandraX can prove properties of the model
that rely only on the type of the power function (real -> real -> real),
but not on specific mathematical properties of the power function. If these
were required, for example to prove termination of some recursive function
that relied on them, we would need to enrich the model with more details about
the power function.
Finally, if verification goals and/or region decomposition were enabled on this model, details about these would appear in collapsible panels below the opaque functions.
Opaque functions pane
This gives another view into the set of opaque functions in the metamodel. When a non-leaf node in one of the tree views on the left is selected, the opaque functions pane is filled with information about all opaque functions in all the modules in the subtree below that node. If the top node is selected, all modules are listed with their opaque functions if any.
The three examples below show the opaque functions pane shown after selecting branch nodes in all three of the tree views:
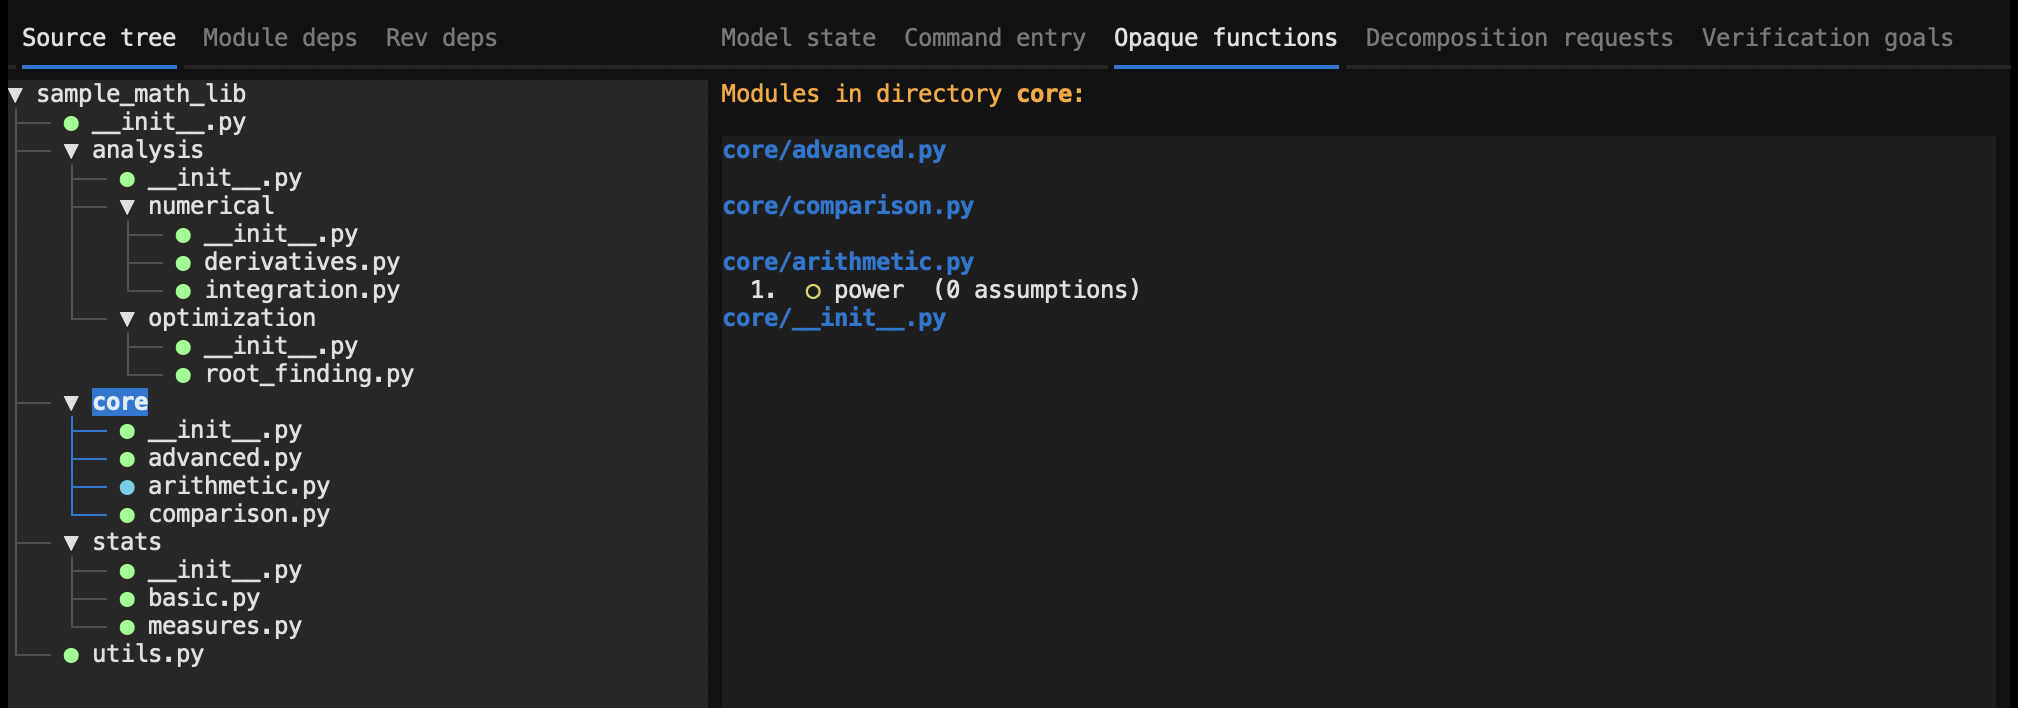
The verification goals and region decompositions pane work in the same, aggregating information for all the nodes under the most recently selected node in the the tree views panel.
Opaque functions screen
As well as the opaque functions panes in the 'Model View' screen, there is also an 'Opaques' screen, which you can switch to by clicking on the menu on the bottom edge of the TUI, or by pressing 'k'. This screen displays the opaque functions in all the models in the metamodel, and hence is equivalent to the 'opaque functions' pane in the model view after selecting the root node.
Conclusions
This completes part one of the CodeLogician TUI tutorial, which introduces the concepts of formalisation and the main components of the user interface, excluding verification goals, region decompositions and command entry.
What You've Learned
In this tutorial, you learned how to:
- Install and set up the CodeLogician server and TUI
- Navigate the TUI interface and its different screens
- Understand formalisation concepts: admissibility, transparency, and opaqueness
- Explore the model view, dependency trees, and opaque functions
- Interpret formalisation status indicators
Next Steps: Continue to Part 2 to learn about verification goals, region decompositions, and advanced features.