VS Code Guide
The ImandraX VS Code extension provides a rich, interactive environment for writing, verifying, and exploring proofs in .iml files.
Installation
1. Install the extension
Search for "ImandraX" in the VS Code Extensions marketplace, or install from the marketplace page.
2. Install ImandraX
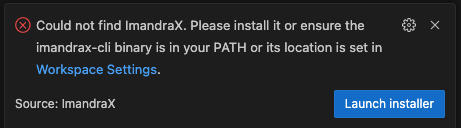
When you first open a .iml file, the extension checks for the imandrax-cli binary. If it's not found, you'll see a prompt:
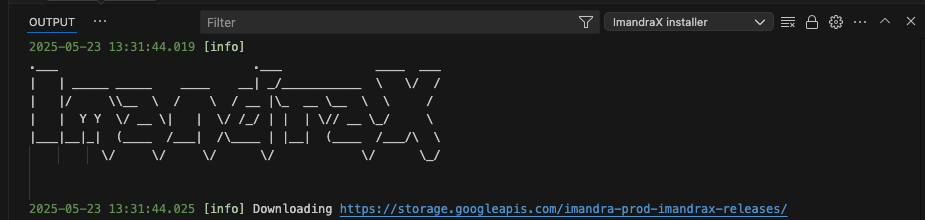
Click Launch installer to download and install ImandraX automatically. The Output panel shows installation progress:
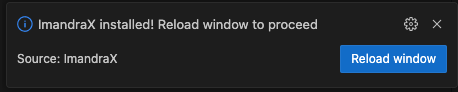
When installation completes, click Reload window to activate:
3. Configure your API key
On first activation, the extension prompts you to configure your API key:
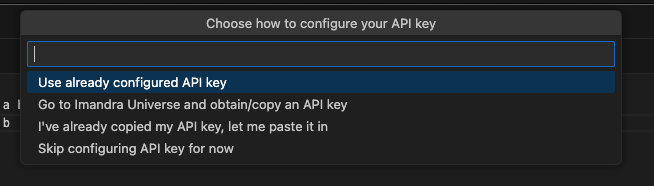
You have several options:
- Use already configured API key — If you've already saved your key to
~/.config/imandrax/api_key - Go to Imandra Universe and obtain/copy an API key — Opens the website to get a key
- I've already copied my API key, let me paste it in — Paste directly into VS Code
- Skip configuring API key for now — Configure later
You can also set your API key manually by saving it to ~/.config/imandrax/api_key or setting the IMANDRAX_API_KEY environment variable. See Installation for details.
Working with .iml files
When you open a .iml file, the extension automatically activates and begins processing. You'll see:
- Green indicators next to successfully admitted definitions and proved theorems
- Red indicators next to failed verifications, with counterexamples or error messages shown inline
- Yellow/orange indicators for definitions or proofs currently being processed
As you edit, the extension uses incremental checking — only the definitions and proofs affected by your changes are re-verified.
The Goal State Viewer
The Goal State Viewer shows you the current proof state — what you need to prove and what you have to work with.
Opening the viewer
Open the command palette (Cmd+Shift+P on macOS, Ctrl+Shift+P on Linux/Windows) and run ImandraX: Open Goal State. The Goal State Viewer panel opens (typically on the right side) and automatically displays the proof state for each open goal in your file — showing what needs to be proved and what hypotheses are available.
You can also hover over any goal (a verify, theorem, or lemma) in the editor to see a summary and an Open Task in Browser link, which opens a detailed view of the result in the ImandraX web interface.
When your goal uses tactics, you can hover over each individual tactic in the [@@by ...] annotation to see exactly how that tactic transformed the proof state — what subgoals it produced, which subgoals were closed, and what remains to be proved. This makes it easy to understand and debug complex tactic compositions step by step.
Understanding the display
A typical goal state looks like:
Hypotheses:
  H0: is_sorted x
  H1: is_sorted y

Goal:
  is_sorted (merge x y)
This reads: "Assuming x is sorted and y is sorted, prove that merge x y is sorted."
Navigating proofs
When a proof uses multiple tactics (e.g., induction () @>>| auto), you can step through each tactic to see how it transforms the proof state:
- After
induction (): the goal splits into base cases and inductive steps - After
auto: the waterfall simplifies and (hopefully) closes each subgoal
Developing proofs interactively
The Goal State Viewer is especially useful when developing new proofs:
- Start with just the theorem statement (no
[@@by ...]annotation) - See what the initial goal looks like
- Add tactics one at a time, observing how each transforms the goal
- When a subgoal looks like it should be a separate lemma, extract it
Counterexamples and instances
When ImandraX finds a counterexample or instance, the result appears inline with interactive controls:
- Copy — Copies the IML definition of the counterexample value into your buffer as a module. You can then use
evalto compute with these values. - Interact — Opens a REPL session where you can compute with the counterexample value and all your other definitions interactively.
This workflow — find a counterexample, interact with it, understand the failure, fix the specification or code — is at the heart of productive ImandraX development.
Keyboard shortcuts
| Action | macOS | Linux/Windows |
|---|---|---|
| Open Goal State Viewer | Cmd+Shift+G | Ctrl+Shift+G |
| Go to Definition | Cmd+Click or F12 | Ctrl+Click or F12 |
| Trigger re-check | Cmd+S (save) | Ctrl+S (save) |
Workspace configuration
Recommended settings
Add these to your .vscode/settings.json for the best experience:
{
  "editor.formatOnSave": false,
  "files.associations": {
    "*.iml": "iml"
  }
}
Multi-file projects
ImandraX supports multi-file projects using the [@@@import] directive:
[@@@import "utils.iml"]
[@@@import MyModule, "my_module.iml"]
The extension handles dependencies automatically — when you save a file that other files depend on, dependent files are re-checked.
Troubleshooting
Extension not activating?
Make sure your file has the .iml extension and your API key is configured. Check the extension output panel (View > Output > ImandraX) for diagnostic information.
Common issues:
- "Connection failed" — Check that your API key is valid and you have network access
- "Could not find ImandraX" — Click "Launch installer" or ensure
imandrax-cliis in your PATH - Slow processing — Large files with many theorems may take time on first load. Subsequent edits use incremental checking.
- Red squiggles everywhere — Check for import errors. Missing imported files will cause cascading errors.